Sunday 22 December 2013

Twelth Make for Christmas - A Crafting Small


A true story about a Tiny Boy...


A Crafting Small

Difficulty: Ranging from wonderfully simple to more challenging that you could possibly imagine.

You will need: A Small. A crafty-minded Mummy (or Daddy/other adult role model), paper, pen, scissors, pins, felt, needle, thread.

Make things all the time. Knit with the Small in your lap, crochet whilst reading stories, cook with 'help', explain how the sewing machine works (again), sow seeds and let little fingers tuck them in.


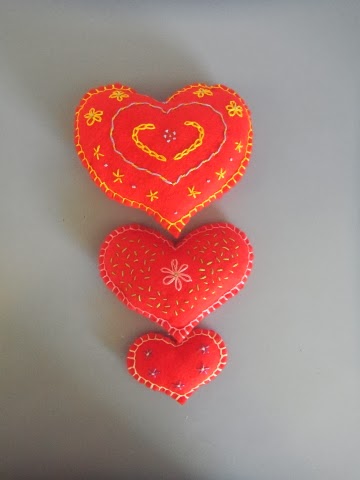
One day your Small will say something along the lines of 'Mummy, I need some red material' and will follow it up with 'Mummy, how do you make a stocking?'. Pounce, seize the day, grab the moment with both hands.


Make a paper pattern, help with making the stocking shape less wobbly, pin the pattern to the felt and cut it out twice. Pin the pieces together and thread the needle. Show the Small how to make neat little stitches all round the edge. Untangle the tangles and rethread the needle a zillion times. Grin inanely when they are pleased as punch to have sewn all the way round SO quickly. Congratulate them on their cleverness to have done it nearly all by themselves and remind Santa that a little extra something will be required to fill a little extra stocking.


Now, some lovely friends of mine are arriving today, having travelled for 5 days and 4500 miles to get here, so I am going to take a little bloggy break for a couple of weeks. Have a wonderfully fun and restful Christmas and New Year and I'll see you on the other side...

xx

Saturday 21 December 2013

Eleventh Make for Christmas - Paper Chains

 
Today's offering is inspired by the make-do-and-mend/make-something-out-of-nothing spirit brought on by necessity in such a remote place. Planters are made out of tyres, tables out of oil drums. Cars are held together with duck tape and cable ties and my Christmas decorations are made out of newspaper.
 

Paper Chains

Difficulty: Child's play.

You will need: newspapers, scissors, stapler, good TV or a film.


Press play on the DVD player. Cut many many strips, each about 4cm wide and 15cm long.


Go wild with a stapler.


Balance precariously on a chair to attach them to the ceiling by any means you fancy. I used sticky tape but I live in a tin house owned by someone else.


Add a centre piece of your choice - Chinese lantern?


If the film's not finished, what about some paper stars, snowmen...

xx

Friday 20 December 2013

Tenth Make for Christmas - Jam Jar Lanterns


These little beauties will add a touch of sparkle to proceedings. Great for hanging in trees...


Jam Jar Lanterns

Difficulty: The Smalls can do it with a tiny amount of help.

You will need: jam jar, glue (modge podge or pva), paint brush, tissue paper, wire, wire cutters, tea light, matches.


Tear the tissue into little pieces.


Glue to the jar  to make a picture, or a pattern or a cutting edge post modern abstract image.


Once the glue is dry, give it another coat.

Stocking

Bethlehem

Moon over lake in snow
 Once all is dry cut a 60 - 70 cm length of wire.


Twist round the top of the jar.


Bring the long end over the top and tuck through to make a handle.


Bend the handle into a pleasing shape.


Light a tealight and carefully drop into the lantern.


xx

Wednesday 18 December 2013

Ninth Make for Christmas - Mincemeat Cake


Don't forget my giveaway over here.

Today's make is anther bake, it is adapted from a recipe in 'What's Cooking on St Helena' a recipe book that as far as I am aware is not available other than on the island. It is full of classic 'Saint' dishes as well as a WI-style sensible range of soups, cakes, preserves etc. Most importantly it doesn't include fancy ingredients that you can't get here.


Mincemeat Cake

All the taste of Christmas without any of the fiddling about rolling out pastry. A great alternative if you haven't made a traditional Christmas cake.

Difficulty: As Easy Peasy as you can possibly get. If you can switch on the oven, you can make this cake!

You will need:

5oz / 140g soft margarine
5oz / 140g dark brown sugar
2 eggs
8oz / 225g self raising flour
3oz / 85g currents
1lb / 450g jar of mincemeat
1oz / 28g flaked almonds

Scales, mixing bowl, wooden spoon, 8 inch / 20cm cake tin, baking paper, oven.


Preheat the oven to 160 C / Gas 3. Grease and line the cake tin with baking paper. Beat together the margarine and sugar. Add all the other ingredients except the almonds and beat until blended. Spoon into the tin and smooth the top. Arrange the almonds on top in a manner that pleases you. Bake for about 1 hour 20 mins until golden and shrinking away from the sides of the tin.


Leave to cool before turning out and removing the baking paper.


Enjoy!

xx

Sunday 15 December 2013

Eighth Make for Christmas - Shop til you drop bag


Firstly, don't forget my giveaway on the last post.

Today we have a quickish make that would make a lovely gift or just keep it to help you with that last minute shopping.

 
Shop til you drop bag
 
Difficulty: If you can sew in a straight line and wield an iron, you can make this.
 
You will need: Fabric, scissors, tape measure, iron, pins, sewing machine, thread.
 
I have allowed a 1cm seam throughout.
 

Cut out your fabric. I used three different fabrics. We will call the roses fabric A, the gingham fabric B and the small floral fabric C.

From fabric A cut two pieces 45 x 25cm and two pieces 7 x 75cm. These will be the outer of the bag and the handles.
From fabric B cut one piece  45 x 33cm and two pieces 16 x 16 cm. These will be the outer of the bag and the pockets.
From fabric C cut one piece 45 x 79cm. This will be the lining.
Iron all the pieces.


Using the iron, turn over 1cm all round each of the pocket pieces then turn down 2cm more at the top edge.


Turn over 1 cm each side of the two handles.


Then fold them in half length ways.


Sew a few mm in from the edge along both sides of each handle.


Join the two large rectangles of A to each long edge of B to make a rectangle 45 x 79cm which will be the outer of the bag. Open out the seams and iron flat.


Sew across the top edge of each pocket.


Position the pockets on to the right side of the outer and the lining. They should each be centred and about 9cm down from the top. Sew down one side, across the bottom and up the other side of each pocket.


Fold the outer of the bag in half with right sides together and sew down each side. Do the same with the lining. Turn the outer the right way out and iron. Leave the lining as it is.


Using the iron, turn down 2cm to the inside of the outer and to the outside of the lining.


Push the lining into the outer, line up the top edges and pin. Position the handles about 8cm in from each side of the bag. Push about 5cm of each end of each handle in between the two layers of the bag. Pin into position.


Sew round the top edge of the bag a few mm from the edge and again about 3cm down from the edge. this second line of stitching will catch the handles again giving them added strength.

Iron your lovely creation.


Stand back and admire with a gleeful grin.


Give to a friend or shop til you drop.

xx

Wednesday 11 December 2013

Seventh make for Christmas - Heart Strings AND a Giveaway


Goodness, time flies when you are having fun! I have just realised that this is my 200th post, so with that in mind, there will be a little giveaway at the end...

But  back to today's make. It is inspired by a number of things I have seen in blogland, and in reality of the last few weeks and months that have combined into a little make that I love love love.

Firstly there was my little foray into embroidery back in April. Then there was the AMAZING crewel work on the Great Tapestry for Scotland, then there was the gorgeous work of Lynn over at Textile Treasury with felt and embroidery threads. Between them they inspired me to have a go at these...


Heart Strings

Difficulty: Pretty easy and a good way to dabble with a few embroidery stitches.

You will need: paper, pencil, paper scissors, pins, felt, fabric scissors, embroidery threads, needle, stuffing, ribbon, crochet hook or bent paperclip.


Cut out three heart templates in decreasing sizes. The easiest way to do this is with the paper folded in half. Get the big one right then copy it and draw the next one inside and so on.


Pin each template to the felt and cut two of each size.


Play with the embroidery thread colours and stitches to your heart's content. You can probably get a book of stitches from the library or google it. I just did, and it came up with dozens of perfectly excellent guides. If you plan to hang the heart string against the wall then you only need to do one of each size but you could do both. Up to you!


Use blanket stitch to join the two hearts of each size together, not forgetting to pop in a bit of stuffing before you close it up. You could use toy stuffing, the inside out of an old pillow or cushion, or even cotton wool. You don't need much.


Now, this is the important bit that you mustn't forget: once you have your three pretty little hearts, you must stand back and admire them.


If you have lovely people around you, you must show them and share how lovely and squidgy and beautiful they are.


You must rearrange them, just because you can.


If you have Clara visiting, you must, of course, show them to her.


Then you must find some pretty ribbon and tie a loop in one end.


Then, impale your largest heart on a crochet hook and use it to pull the ribbon right down through it.


String the other hearts the same way then fiddle with the spacing.


Closer?


Not so close?


When you have found the perfect spacing, put a couple of tiny stitches through the top of each heart to secure them.


Then look for the perfect place to hang them.


And that brings me nicely to my 200th post giveaway. I will be giving away my little red heart string. I am afraid it will arrive with the winner in the New Year, but you know what they say: a heart string is not just for Christmas...


To enter the draw, all you have to do is leave a comment on this post and become a follower if you wish, and for another chance to win, pop a link to here on your own blog and come and tell me when you have. Entries in by Wed 18th please.


xx